
Microsoft released a feature called “Request Files” that they did not make a lot of fanfare about. However, we here at Diligex believe this feature is way too awesome not to share with our readers! So – what exactly is this feature all about? Let’s dive into it here.
Here are a few Key Points with File Request:
- Anyone with the file request link can send you a file; they don’t need to have OneDrive.
- All the files sent to you are saved in a single folder that you choose.
- Every file will have a prefix to help you identify who uploaded it.
- If two files with the same name are uploaded, OneDrive will automatically add a number to the name of the second file.
- People who respond to your request can only upload files. They can’t view or edit the contents of your OneDrive.
An important note per Microsoft:
“With the file request feature in OneDrive, you can choose a folder where others can upload files using a link that you send them. People you request files from can only upload files; they can’t see the content of the folder, edit, delete, or download files, or even see who else has uploaded files.”
To reiterate the point above, we agree with Microsoft the importance of this security feature mentioned. Users are not able to see the contents or modify the folder, keeping information safe and secure.
Setting up and using OneDrive’s “Request Files” Feature
Before we start on how to set up and use this feature, we need to note the following:
- Request files is only available for OneDrive for work or school accounts and your admin must enable Anyone links in OneDrive. Please contact your admin if you don’t see this feature.
- This feature is not available for Office 365 Government, Office 365 operated by 21Vianet, OneDrive for home, or Office 365 Germany.
Requesting Files
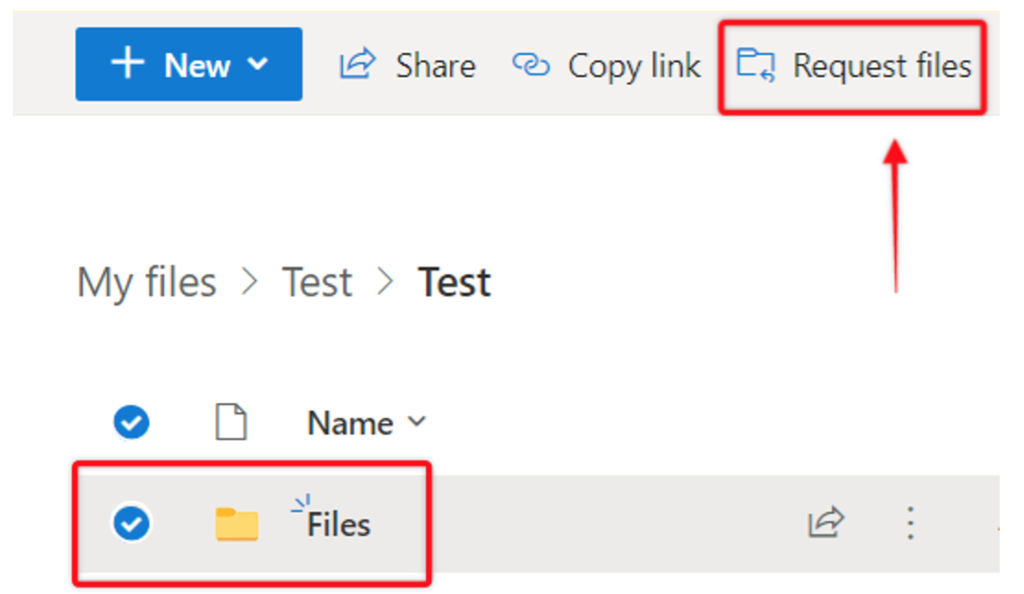
- In your OneDrive, create a new folder or if one is already created, select the folder where you want the files to be uploaded, and then select Request files.
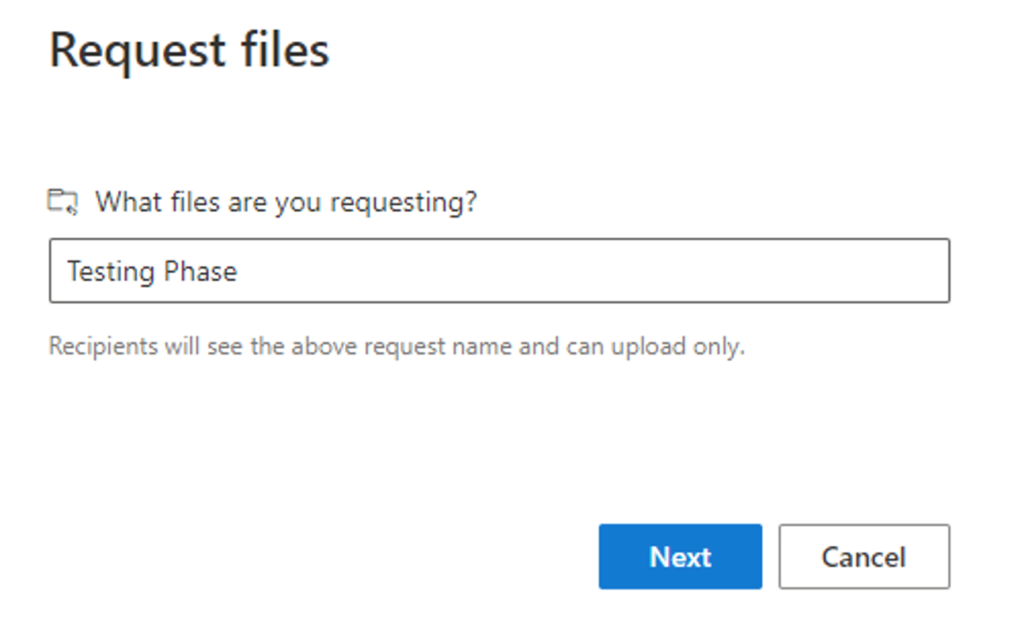
- Under “What files are you requesting?”, enter a descriptive name for the files you are requesting from others and the click “Next.” (Users will see this description when they get the file request.)
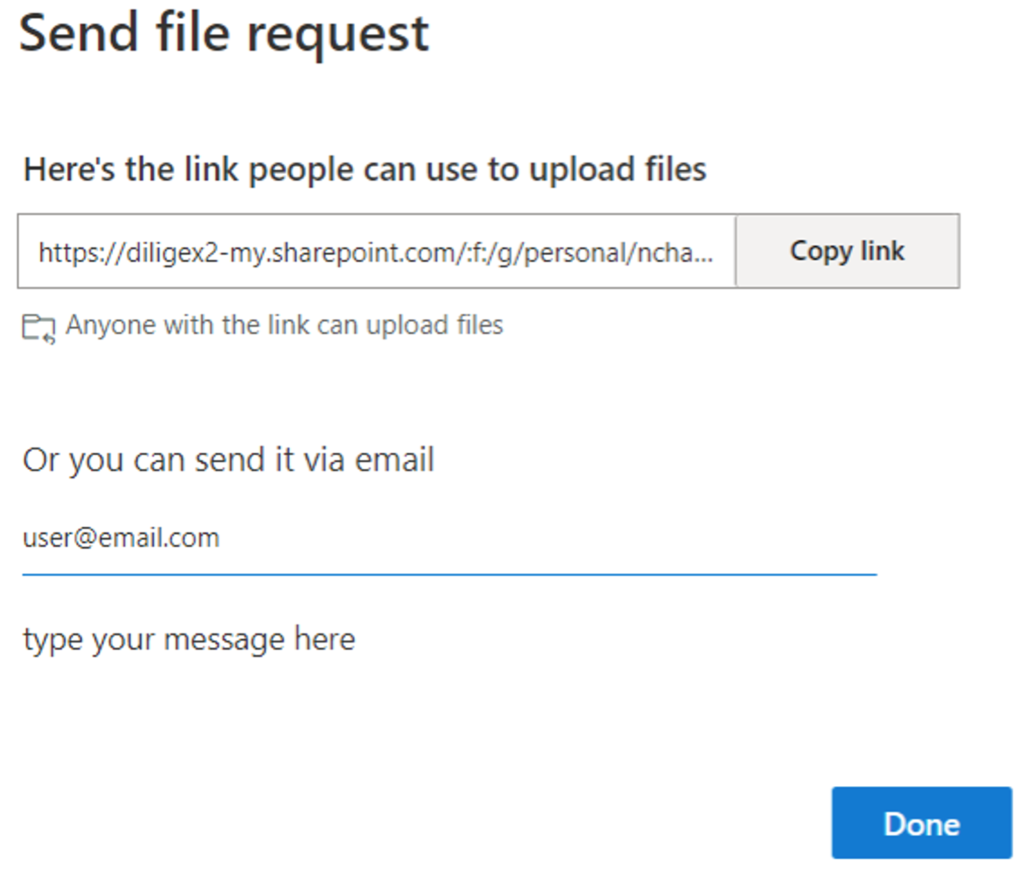
- You can select “Copy link” to copy the request link and send it to anyone you would like to request files from, or you can enter the email address or addresses of the people you want to request files from. You can also type a message that will be included in the email that OneDrive sends to them. Once you are finished you can click “Done.”
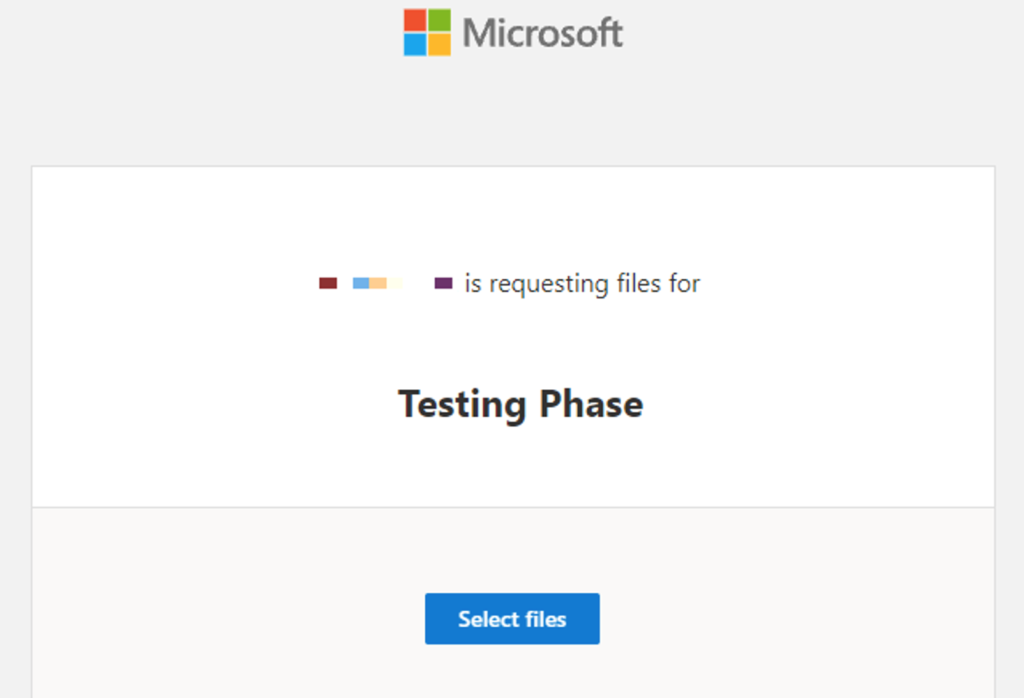
The recipient will be able to open the link you send on either a computer or mobile device (iPhone and Android) and there is no need for them to login to any Microsoft account to upload a file. You’ll receive a notification email whenever someone uploads files to your file request folder.
If you want to edit the descriptive name of the file request, select the folder, and select Request files again, then change the name. The people you sent the request to, will see the new name when they upload files.
This is how the page will look on the recipient’s end when they click on your link:
The “Select Files” button will allow them to take a picture, record a video, or chose a file from their device. There is no limit for file size upload. We tested with a multitude of file types and sizes and were able to upload a video taken from an iPhone that was about 3 GB in size.
Stopping File Requests
You can stop requesting files by deleting the file request link once you are done receiving files from others. Once you’ve deleted the link, people with the link won’t be able to upload files to that folder anymore.
- In OneDrive, select the file request folder.
- Select the ellipsis (…).
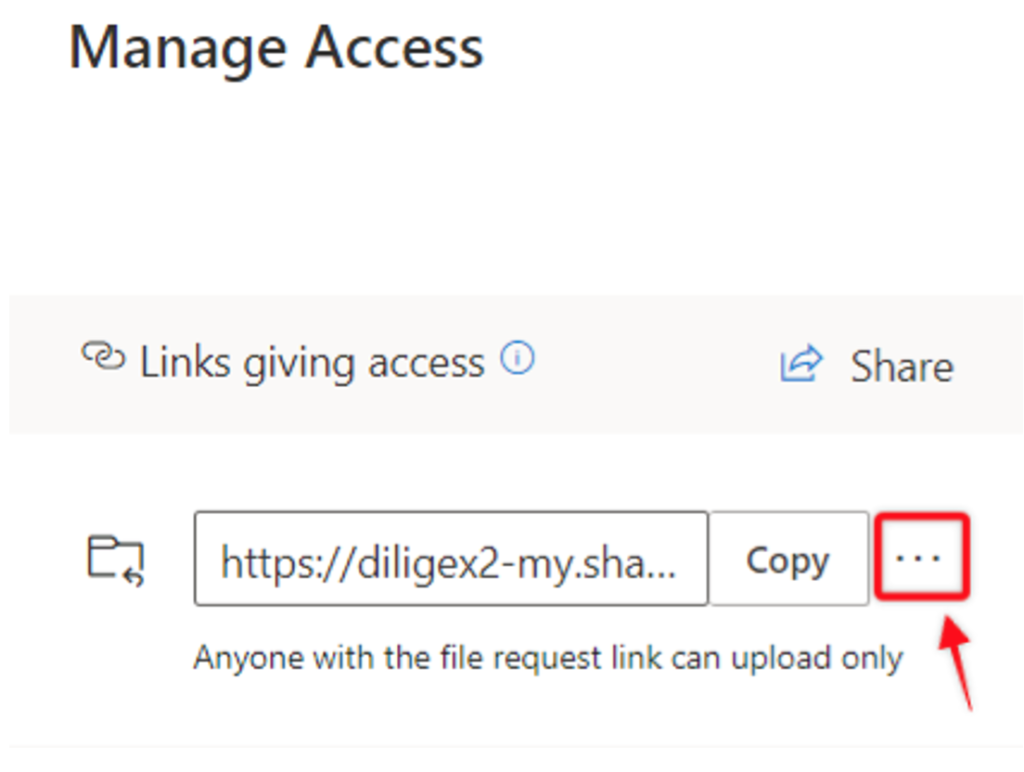
- Select Manage Access.
- Select the ellipsis (…) beside the request link in the Links Giving Access section.
- Select “X” next to the link.
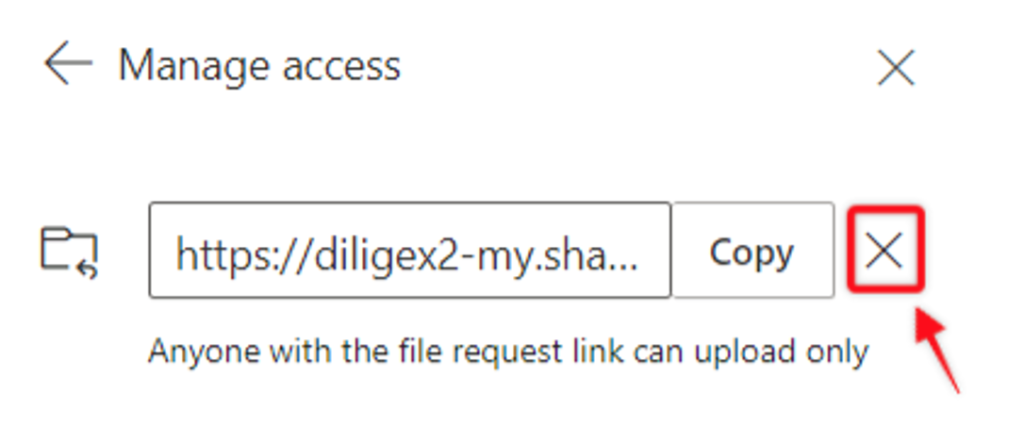
- Select “Delete link.”

- Note that the link deletion cannot be undone. If you need to start collecting files in this folder again, create a new file request on the folder and send your recipients a new link or email invitation.
Pros and Cons
Pros
- No login required
- Works on PC/Mac
- Works on mobile devices (Android or ios)
- No file upload limit
- All files in one place
- Link Expiration/deletion (is adjustable – however 30 days max)
- Files organized by sender
- Applicants cannot see the folder contents or what other people have uploaded. Only the folder creator will have access to the folder contents
Cons
- Recipients can’t access files (Recipients will not be able to delete or edit the file once uploaded)
- Links can be shared
- Link will only last 30 Days at the most
Use Cases
Now that we know what the File Request feature is and how to use it, let’s talk about who would potentially benefit from this feature.
- Educators in a school or University setting. This is a great and safe way for students to upload homework assignments or even class projects/videos.
- Real Estate agents. The file request feature is also a great way for agents to receive files, e.g., Closing Documents, etc., from your clients
- In a Request for Proposal (RFP) situation where you need to collect bids from others
This are just to name a few but hopefully it shows how versatile and useful this feature can be.
As for Diligex, we personally have a client who uses the File Request for potential hires. Job Applicants send their resume and any other documents to a “Job Applicants” folder in SharePoint that the End User created and with the naming feature, applicants can enter their name when uploading and it is appended to the file name, making organizing easy.
If you haven’t given this feature a try, we urge you implement it in your workflow to see how beneficial it can be.